
Wind loading surprises, gutter decisions and a ventilation lesson — the honest notes from a recent build.
Every greenhouse build teaches you something. The Kajiado one taught us three things, all at once. Ten spans of 8 m, a 50 m run, gutter-connected steel on the open plains near Isinya — a textbook build on paper, for a tomato crop aimed at Nairobi. The plans were fine. The site had other opinions.
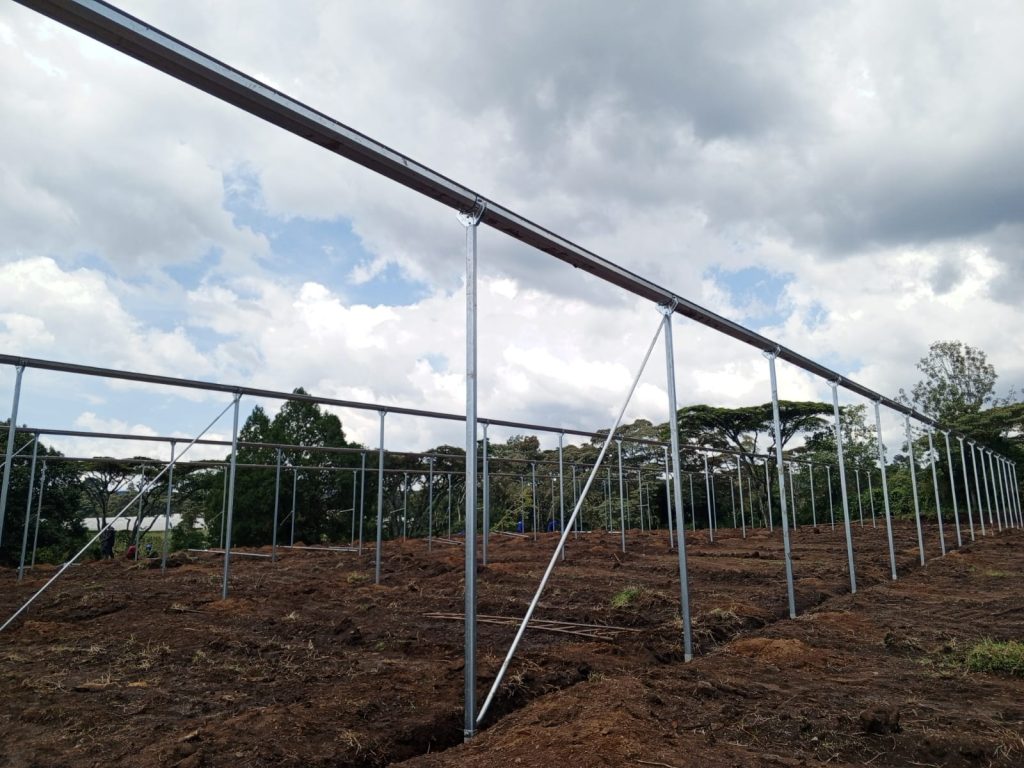
Lesson One: In Kajiado, Design for the Wind You Actually Have
We specced the structure to standard wind loading and assumed that was enough. Then we stood on the site in August, and watched the plastic on an older tunnel across the valley lift like a sail. The Kajiado plains don’t get gusts — they get sustained wind, and it doesn’t stop for days.
Three things we learned the hard way:
- Uplift is the real enemy, not push. A multispan roof is an airfoil in crosswind. The structure tries to lift off its footings before it tries to fall over. Our standard 600 mm post holes were fine mid-field; the perimeter and corner posts got 900 mm holes with larger concrete pads. That upgrade cost a few days and was worth every bag of cement.
- Bracing is cheap insurance. We added diagonal bracing to every bay along the gable ends and knee braces at every post-to-gutter connection. In a 10-span block, the whole structure is only as stiff as its weakest row.
- The windbreak paid for itself before the crop went in. We ran a 50% shade-net windbreak fence along the windward side. A windbreak protects roughly ten times its height in downwind distance — our 3 m fence sheltersed the entire block. Wind pressure on the structure dropped noticeably, and as a bonus, so did the dust load on the plastic. Cleaner plastic means more light, and in a high-altitude site you never give light away.
Lesson Two: The Gutters Are Two Decisions, Not One
Gutters force you to answer two separate questions, and we nearly answered only the first one.
How high? We went with 4 m gutters instead of the standard 3 m. More steel, more cost, more wind exposure — and the right call. The extra air volume buffers both the midday heat and the cold Kajiado nights, and it lets us train tomatoes higher without cooking the growing point. The one catch: taller gutters catch more wind, which loops back to Lesson One. You can’t buy your way out of bracing with a lower roof on this site.
What size, and why? This is the decision we almost missed. One acre of roof is 4,000 m² of catchment. At Kajiado’s ~550 mm of annual rain, that’s over 1.5 million litres of water a year falling on a site where borehole water is the scarcest input on the budget. So we oversized the gutters to 150 mm, ran a proper fall to multiple downpipes, and fed everything into storage with first-flush diverters.
Two gutter notes from the field: run a genuine slope — long gutter runs installed “level” will overflow in the first tropical storm, because Kajiado rain arrives as 20 mm in fifteen minutes, not gentle drizzle. And budget for dust. There’s no leaf litter out there, but the dust and grit that settles in gutters will clog a small downpipe by the second season. Bigger gutters, bigger outlets, and a clean-out each dry season.
Lesson Three: The Ventilation Spec Is for the Still Days
Our mistake wasn’t the vents — it was the vents behind insect netting. We fit 50-mesh net on all openings for thrips and whitefly control, knowing it costs airflow, and specced vent area accordingly on paper. Then came the still, hot afternoons — no wind at all, the one condition the site hadn’t shown us during the site visit — and the interior ran 8–10 °C above ambient. Tomato pollen doesn’t set above roughly 32 °C. We were sterilizing the crop with our own ventilation plan.
The fix, in order of impact:
- More open area. We brought effective open vent area to roughly 25–30% of the floor area — oversized on paper, because the 50-mesh net gives back only about two-thirds of what the drawings promise.
- Open the leeward vents first. With strong wind, windward roof vents billow the plastic and hammer the mechanisms. The operating rule is now simple: leeward side first, windward last, and closed entirely on the bad August days.
- Accept the mesh trade-off deliberately. We kept 50-mesh on the roof vents where the pest pressure is worst and used coarser net low on the sides, where airflow matters most at crop height.
The principle we wrote into our own spec sheets afterward: design the structure for the windy days, and the ventilation for the still ones. Kajiado gives you both, usually in the same week.
The Build on One Page
| Item | Spec |
|---|---|
| Structure | 10 spans × 8 m × 50 m (≈4,000 m²) |
| Gutter height | 4 m |
| Footings | 600 mm mid-field, 900 mm perimeter/corners |
| Windbreak | 3 m, 50% shade net, windward side |
| Ventilation | ~25–30% open area behind 50-mesh |
| Rainwater capture | 150 mm gutters → 1.5M+ litres/year |
The Bottom Line
The build succeeded, the crop established well, and the client is expanding to a second acre. But the honest notes are these: the wind was worse than the standard spec assumed, the rainwater was more valuable than the gutters we almost undersized, and the ventilation failed on the only days the wind wasn’t doing the work for us. None of those lessons showed up on the drawings. They showed up on the site — which is exactly where you should spend the extra day, before the concrete truck arrives, on every build.