
Clearing, grading, levelling, drainage — why the sequence matters as much as the work itself.
Land preparation mistakes are patient. They don’t show up on planting day. They show up in year two, as a pond where your beans should be, a hollow where a buried windrow settled, or a field that drains beautifully — into your neighbor’s. Almost every one of those failures traces back not to bad work, but to good work done in the wrong order. Earthmoving is expensive enough once. Here’s how to make sure you only ever pay for it once.
Before You Touch the Land: Map It
The cheapest survey you’ll ever run happens during the first heavy rain on the raw block. Walk it. Watch where water flows, where it ponds, where it exits the property. Mark those lines — they’re your drainage plan, drawn for free by the water itself. Add a soil test per zone and you’ll know what you’re working with before a single machine rolls in.
The anchor for everything that follows is the outlet — the lowest point where water can legally and physically leave the field. Every drain, every grade, every levelling pass ultimately answers to it. If the outlet is higher than your planned field surface, no amount of beautiful levelling will save you.
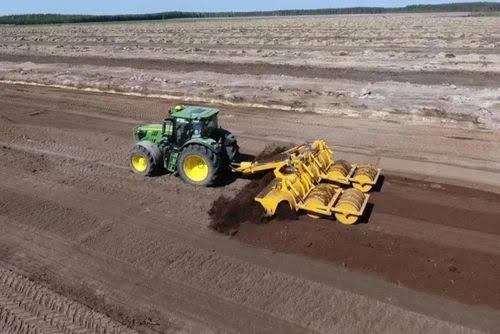
Stage 1: Clear — Completely
Cut trees, pull brush, dig rocks. Then the part people rush: stumps and roots, out of the ground. Buried stumps look solved for a season or two. Then they rot, the ground above sinks, and you’re left with boggy hollows, an unploughable field, and a termite and root-fungus problem delivered straight to your new crop. Burying brush in windrows does the same thing on a larger scale — every windrow becomes a settlement trench.
Clear it once, clear it properly, or clear it again for the next ten years.
Stage 2: Strip and Stockpile the Topsoil
If the job involves serious cut-and-fill, scrape the top 100–200 mm of topsoil aside first. It feels like an unnecessary step — until the grader buries your only good soil under sterile subsoil and you spend five years farming dirt that grows nothing. Stockpile it, do the earthmoving, respread it. This one step is often the difference between cropping in year one and rehabilitating in year five.
Stage 3: Rough Grading — Move the Big Volumes
Now shape the macro-terrain: fill the hollows, cut the high spots, establish the broad fall of the field. Do this before any soil conditioning, and here’s the blunt reason: anything you spread before the earthmovers arrive — compost, lime, gypsum — will be scraped into windrows and buried in the fill. The grader doesn’t know what your amendments cost.
One rule: compact fill in layers as it’s placed, or leave generous overfill — fresh fill settles 10% or more, and it settles unevenly.
Stage 4: Drainage — From the Outlet Backwards
With the rough shape in place, install the drainage: the outlet and main drains first, then the laterals. Working from the outfall upstream means every metre of drain you cut has somewhere to deliver water to. Cut the laterals first and you’ll watch your trenches fill into a holding pattern.
Drainage comes before final levelling for the same reason: the finished surface must grade toward the drains. Level the field first, cut drains after, and you’ll spend the levelling budget twice.
Stage 5: Rip the Compaction You Just Caused
Here’s the honest irony of land prep: the clearing and grading machinery — dozers, scrapers, dump trucks — has just compacted your field with passes that can exceed any tractor’s. So now rip or subsoil to 400–600 mm to shatter that pan and the old one beneath it.
Timing matters: rip when the soil is dry enough to shatter. Rip wet soil and the tines smear it into polished slots that channel water and grow nothing. And rip before final levelling, obviously — no point finishing a surface you’re about to plough through.
Stage 6: Fine Levelling
Now laser- or GPS-grade the surface to its final form: within about ±20 mm for rice paddies and drip fields, or a smooth 0.1–0.5% fall for furrow and border systems, feeding the drainage you’ve already built. This is the precision pass — and it only stays precise if nothing heavy rolls over it afterward.
Stage 7: Amendments — Now, Finally
Spread lime, gypsum, compost, and starter fertility now and incorporate into the root zone. Nothing from here on will scrape them away or bury them. Pay special attention to the cut areas, where topsoil stripping and grading have exposed subsoil — those zones need extra organic matter, or they’ll lag the rest of the field for seasons.
Stage 8: Seedbed and Plant
Harrow to a fine tilth, form your beds or ridges, and plant. If you can afford the time, letting freshly graded land go through one wet season before the final pass lets settling happen on nature’s schedule instead of in your crop rows.
The Sequence on One Page
- Map — watch the rain, test the soil, fix the outlet
- Clear — stumps and roots out, not buried
- Strip topsoil — stockpile before cut-and-fill
- Rough grade — move the big earth, compact the fill
- Drainage — outlet first, mains, then laterals
- Rip — dry soil, deep, before finishing
- Fine level — to the drains, to the tolerance
- Amend — spread and incorporate, extra on cut areas
- Seedbed and plant
The Bottom Line
Every stage in that list exists to protect the ones after it. Level a field with no drainage and you’ve built a pond. Spread compost before grading and you’ve fertilized the fill zone. Skip the topsoil strip and you’ve buried your best asset. The work is the same either way — the machinery costs the same either way. The sequence is the only free decision you get to make. Make it in the right order, and land preparation is a one-time investment. Make it wrong, and you’ll be re-doing pieces of it, quietly, for years.